


Overview
Rotary screen printing is a traditional textile printing method. While this process differs greatly from modern digital processes, it’s still widely practiced all over the world and used on the majority of printed textiles. Rotary screen printing has unique capabilities and allows for process control that digital printing doesn’t. Let’s dive in and find out why this method continues to reign supreme.
The Rotary Screen Printing Process
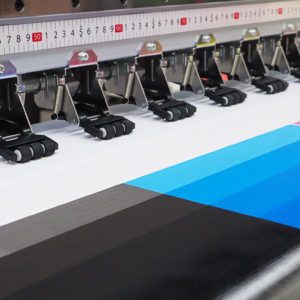
Rotary screen printing is a continuous method of printing in which a perforated cylindrical screen applies a colorant made from either pigment or dye. The colorant is forced from the interior of the cylindrical screen and onto the fabric. A special pump automatically feeds a paste inside the perforated cylinder (or spherical screen) and, as the screen rotates, a squeegee device inside the screen pushes the dye through the screen onto the fabric. Each screen is independently driven and up to 16 separate colors can be applied.
Rotary screen printing is the go-to process for many companies and brands today simply due to its superior production capacity. The rotary screens can operate at fast speeds and can print up to 120 yards per minute. When it comes to long-runs and specialty surface applications, the rotary screen printing process offers incomparable results.
Key Features of Rotary Screen Printing
Continuous Printing Method
This process allows for the print to be continuous because the fabric flows through the rotating cylinders at a rapid rate without having to reset the machinery. This makes the print continue for as long as the length of the fabric. Unlike flatbed printing, this process does not create cut or break lines.
Cylindrical Rotating System
The colors (dye or pigment) are applied through a perforated cylindrical rotating screen.
High Production Capabilities
With typical production speeds ranging from 50 to 120 yards per minute, rotary screen printing is a quick way to produce high-quality large runs.
Surface Treatment Ability
Rotary screen printing allows the application of additional components (such as glitter, adhesives, sequins, pearlescent, metallic, & 3D particles) to the fabric. (For reference, digital printing processes cannot apply surface treatments.)
Step-by-Step Guide
Step 1
The rotary cylindrical screens are set in place on the rotary printer. Screens are made from nickel and have a special coating that is burned out through a laser engraving process to make the design.
An aluminum ring on each end of the screen holds the screen in place onto the printer. Screens should be held by the end ring because the screens are very delicate and can easily be ruined.
Screens must be aligned and adjusted to ensure the print is in proper registration. Registration is the precise alignment of the print and colors.
The screens themselves have different mesh sizes depending on whether you are trying to do a blotch to a half tone, which requires a very fine mesh size. One screen can actually give you two colors (half tones) due to how the screens are cut. That’s because less ink through the same holes will give you two different shades.
Step 2
A magnet bar and squeegee are inserted inside each individual cylindrical screen. These devices act as controls for the printing process and can be readjusted if the print needs more or less pressure in certain areas.
Magnet Bars (also known as color bars) are metal bars that react to the magnet underneath the belt (also known as a print blanket).
Just as there are large brushes and small brushes for painting, there are large and small magnet bars for rotary screen printing. The large magnet bars are used for blotch prints and the smaller bars are used for fine details.
Note: A blotch print is when one color fully covers the fabric (i.e. solid red or solid back on one side of the fabric).
A squeegee runs along the magnet bar and puts constant pressure on the screen, which pushes the colorant through the screen and onto the fabric. In order to prevent color contamination, the belt is constantly cleaned by a brush and water at the bottom of the printer.
Step 3
Pigments or dyes are mixed in buckets and placed beside the printer at their color stations.
Step 4
The colorant is pumped into each printhead separately.
Step 5
A sensor automatically registers whether the printer needs more ink, thus the printer never stops.
Step 6
When the print run is finished, the magnet bar and squeegee are removed, along with the screen.
Step 7
All parts of the printer are thoroughly cleaned for future use.
Bucket (Color Reservoir) Mixing – Pigment or Dye
Rotary screen printing can use either pigments or dyes, which makes it a versatile process for multiple markets and end-uses. Roughly 90% of rotary screen printing utilizes pigments, while about 10% use dyes. It’s important to note that when using dyes, it is considered a wet print process and will require a reduction clear step where the fabric must be washed and steamed.
Bucket Mixing
A color formula of either pigments or dyes are mixed in buckets to create the exact shade needed for the print. Once mixed, the buckets (also known as color reservoirs) are placed next to the printer where they are stationed for the duration of the print job.
Buckets can vary in size depending on the amount of pigment or dye being used in the print
What else is in the bucket?
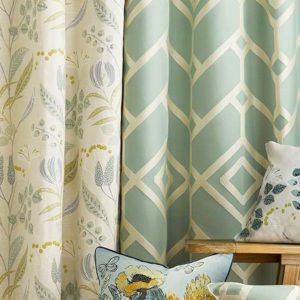
In addition to the colorants, softeners, hand-builders, binders, other chemicals can be added to the mixture. The mixture (or formula) is tailored to the fabric’s end use. For example, the formula used for home furnishings fabrics will be built to ensure great crocking and color-to-lightfastness results. Alternatively, apparel products will require a formula that focuses on hand feel and color-to-washfastness.
How does the pigment or dye get into the screens?
An air pump (aka diaphragm pump) pumps the colorant into the printhead. A sensor inside the printhead registers the level of colorant and automatically pumps more into the printhead when it gets low. This technology allows a continuous printing process because it prevents the loss of pigment or dye coming through the screen.
Advantages & Disadvantages of Rotary Screen Process
Rotary screen printing brings a lot of positive attributes to the table but also comes with limitations. For certain types of production, it will remain the obvious long-term choice. However, as new design capabilities emerge from other printing methods, competition is gaining on rotary screen printing.
Rotary Screen Process Advantages
Fastest Printing Method
With high speeds that can print up to 120 yards per minute, rotary screen printing’s production speed is incomparable.
Quick Changeover of Prints
Rotary screen printing does not require long cleaning or resetting processes between print runs, which makes it extremely cost-effective.
Versatile Design and Special Effect Options
Surface treatments are compatible with rotary screen printing, which allows for unique creative capabilities.
Cost Effective for Long-Runs
Rotary screen printing is the most economical way to print long run production.
Rotary Screen Printing Disadvantages
Not Profitable for Short-Runs
While great for long-runs, this process is not economically feasible for short-run production. Each cylindrical screen must be engraved, which costs between $300-$1,000 per screen. Each color requires its own individual screen, thus if you’re producing a color-heavy print, the cost can become significant. Plus, all of those costs are all accrued during the sampling process – imagine the financial consequence if the customer doesn’t like the sample.
Sampling and Product Disparities
Print samples and production may look different due to the host of variables during each print cycle. If the dyes, pigments, or print environment varies, so too can the print.
Color Limitations
The most high-quality rotary screen printing machines cannot produce more than 16 colors per print. Additionally, only spot colors can be printed, which makes printing a specific brand color exceptionally difficult – if not impossible.
Unable to Achieve Fine Details
Intricate print clarity and detailed precision are not possible with this printing process. Today, this can be considered a significant limitation because this process cannot produce photographs.
Registration Issues
High-speed printing can cause issues with the fabric’s registration because it can easily skew.
Cannot Print Garment Form
This process only has the ability to print selvedge to selvedge, which means printing a garment form perfected for the sewing process is not possible.
Spotlight on Zimmer Austria – And a Visual Breakdown of the Process
One of the most popular rotary screen printers is created by the company Zimmer and produced in Austria. It’s time to see the printer in action – and a few other helpful visuals of the rotary screen printing process.
Fun Fact: Zimmer invented rotary screen printers. Zimmer rotary screen printers use the magnet bar system. To recap, in this system a magnet under each individual color printhead is pulled down by a bar. Simultaneously, a squeegee pushes the colorant from the inside of the cylindrical screen to the outside and onto the fabric.
Summary
While rotary screen printing is the tried and true textile print method, it comes at a price – one that can only be paid if running significant production. Though price is a barrier to entry, rotary screen printing offers unmatched production speeds and capabilities. The print can be manually controlled by magnet bars and squeegees and both dyes and pigments can be used in this process. Rotary screen printing is responsible for producing roughly 65% textile prints worldwide but it’s important to recognize that other print methods (digital printing) are starting to challenge its longevity as the key printing process.